Wednesday, October 26, 2022

RECIPE: Delicata Squash Stuffed with Veggies and Meat

I used this stuffing in red bell peppers and my husband said it was the best I'd ever made.

This is sort of an UN-recipe, one where I describe the procedure, and you use whatever amounts you have on hand.  I prefer to use small squash, so I can eat the skin.  When I use the bigger ones, they're very hard to cut and the skin gets too hard to eat.  

I've read that you can nuke them for 2-3 minutes to soften them so you can cut them, but I prefer not to nuke my food!

Stuffed Delicata Squash


  • baking pan (I used a half-sheet jelly roll pan)
  • Small delicata squash, amount to fit the pan you're using (I used 8)
  • Ghee, melted
  • Yellow onions, minced 
  • Celery stalks and inner leaves, minced
  • Carrots, peeled and minced
  • Sweet peppers, minced - I used red, you can use any color
  • Garlic, peeled and minced
  • Seasoning - I used berbere, you can use curry, italian, mexican, cajun, 
  • Spinach, blanched, drained, and chopped (I like LOTS of spinach!)
  • Cooked meat - I used ground beef, you can use veal, lamb, or chicken instead
  • Optional: grated cheese

Preheat oven to 425.

SCRUB the squash to remove any dirt!  Even if you don't plan to eat the skin, if there is dirt on it it can enter the squash when you cut it open.

Cut the ends of the squash and then cut them in half lengthwise.  Remove the seeds (I use an ice cream spoon for this, because it has a flat end).  Arrange on a baking dish cut side down and brush with ghee.  Flip them over and brush the tops with ghee.  Sprinkle with salt and pepper.

Roast 20 minutes, or until a knife slides easily into the flesh and the tops are a little browned.  

Remove from oven, but leave them on the baking pan.


Meanwhile, saute the onion in the ghee until lightly browned. 

Add the celery, carrots, garlic and seasoning and saute until slightly softened.


Add the spinach and meat and stir to combine.  Season with salt and pepper.


Stuff the squash with the mixture.  You can sprinkle with cheese, if you want.

Return to the oven for 20 minutes until the stuffing is heated.  


These are delicious right out of the oven, and also cold the next day(s).  


RECIPE: Cabbage Roasted and Creamed

I stumbled on this recipe while searching for something else and it looked so good I had to try it.  The roasted cabbage was delicious, but my first attempt of the creamed portion was a little bland for our tastes so I punched it up a bit.  

Original recipe: Roasted Cabbage with Cabbage Cream

Roasted Cabbage on a Bed of Creamed Cabbage

Serves 4-8

  • Two heads cabbage (I used savoy, you can use any green cabbage)
  • 1/2 cup ghee, melted and divided
  • 2 cups broth (veggie, beef or chicken)
  • Salt and pepper 

INSTRUCTIONS: 

Preheat oven to 350.

Cut one head into eight wedges leaving them attached at the core: 

  • cut in half vertically, 
  • cut each half in half, 
  • then cut each quarter in half.  

Arrange them on a baking sheet (I used our toaster oven).  Brush the tops with melted ghee, flip them and brush the remaining sides.  You should use about 1/4 c. of the ghee.

Roast for about 1 hour, rotating the pan after 30 minutes, until they're cooked through and the edges are browned.  Salt lightly.

While the first head is cooking, cut the other head into chunks. Bring the 2 cups of stock to boil over medium heat, add the cabbage, reduce heat to med-low and simmer, partially covered, until the cabbage is very soft and the broth is reduced by half.  About 30-45 minutes.  Make sure the pan doesn't boil dry!

Transfer the cabbage and the reduced broth to a food processor, add the remaining 1/4 c. of ghee, and puree.  Season with salt and pepper.  

Place the creamed cabbage on a platter, arrange the roasted cabbage on top, and serve.  Parsley chiffonade made it look nice but didn't add anything taste-wise.  Two wedges over one quarter of the cream was a nice size meal for me.  One wedge on 1/8th of the cream is a good side dish with, for instance, sausages, which is how my husband eats it. 


This reheats nicely in a small dish in a 350F oven.


Tuesday, May 24, 2022

RECIPE: Improved Copycat GRANOLA without seed oils

The best Granola we've ever purchased is from Plowshare Farm.  They sell it on ETSY, and in our farm store.   My husband eats so much of it, I decided to try and make it myself.  I made a few changes - eliminating seed oils for instance - and it's now "the best granola ever!" according to my husband...

GRANOLA without seed oils 
 

Makes 10 cups.

I started out by separating the components in the Plowshare bag, weighing them, and measuring them.

I came up with the following:

  • 41 g. walnuts (1/3 cup)
  • 39 g. raisins (1/4 cup)
  • 26 g. dates (3 T.)
  • 35 g. oats plus coconut (about 2 c.  I was unable to separate these)

Using several recipes I found online as a guide to the process and baking times, I then made one recipe using those exact proportions, but substituting coconut oil for the sunflower oil.  It was good but we thought it could be better.  

Using cacao butter gave it a slightly chocolate flavor, and replacing the raisins with currants and unsweetened tart cherries joint-friendly.  Replacing the walnuts with cashews and macadamia nuts reduced the omega-6 even further.  I've also just started using sprouted oats, because they have a lower glycemic index.

Several iterations later, this is the version we like the best.  It's also the healthiest I've found anywhere!

I no longer chop my own dates, I buy organic Kartago chopped date cubes here.  They're covered with rice flour.  This brand, which I have not tried yet, does not use any flour.

YOU WILL NEED TWO SHEET PANS, AND TWO OVEN RACKS FOR THE AMOUNT BELOW.  If you don't have two of each, you should halve the recipe.  

INGREDIENTS

  • 6 cups rolled oats, preferably sprouted**
  • 3/4 c. cashew chips (my sister prefers almonds, use whatever nuts you like)
  • 3/4 c. macadamia chips (cashew and macadamia nuts are low in omega-6)
  • 1.5 c. date cubes (if you cube your own, you will need about 9 large medjul dates)*
  • 1/4 c. currants
  • 1/3 c. tart cherries withOUT added sugar
  • 1 T. Ceylon cinnamon (use less, if you prefer Vietnamese cinnamon)
  • 1 t. vanilla powder
  • 1/2 c. cacao butter
  • 1/2 c. maple syrup
  • 1/4 c. malt extract*

INSTRUCTIONS

Line 2 baking sheets with parchment paper.

Preheat oven to 325F (300F if using convention). 

Skip the next step if you're able to source date cubes.

Slice dates into 1/4" strips and sprinkle with some malt extract (about 1-2 T.).  Slice into 1/4" cubes and sprinkle with malt extract to coat each piece (about 1-2 T.).  SET ASIDE to 'dry' while you bake the granola.  Do not mix with the oats until they're cooked!

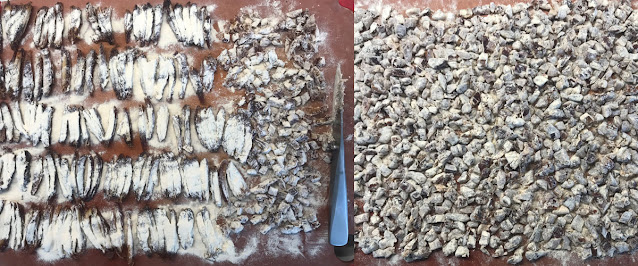
Sliced dates on the left, sprinkled with malt powder, chopped dates on the right.
 
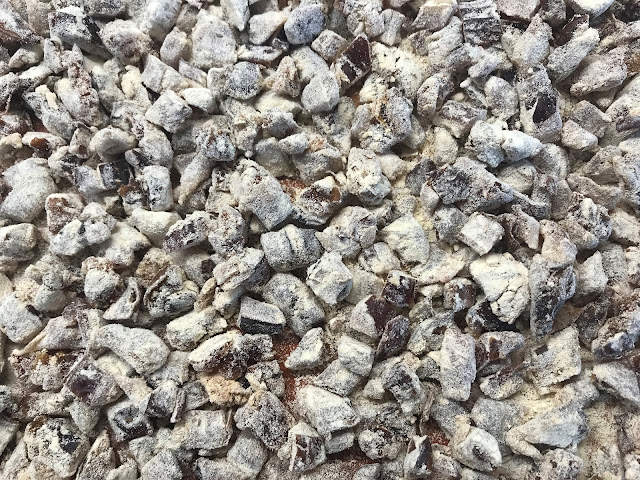
Close-up of chopped dates covered with malt powder.

START HERE if you're able to source dates cubes!

Mix the oats, nuts, cinnamon and vanilla in a large bowl.  I like to use a WIDE SHALLOW bowl as its easier to stir everything together.  DO NOT ADD THE FRUIT AT THIS TIME!

Mix the maple syrup with the remaining malt powder in a small saucepan.  Stir over low heat until the malt melts into the syrup.  Add the cacao butter and stir until melted.


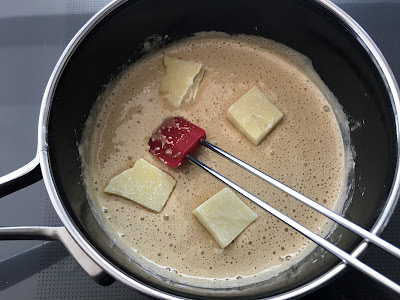
Add cacao butter to maple-malt mixture

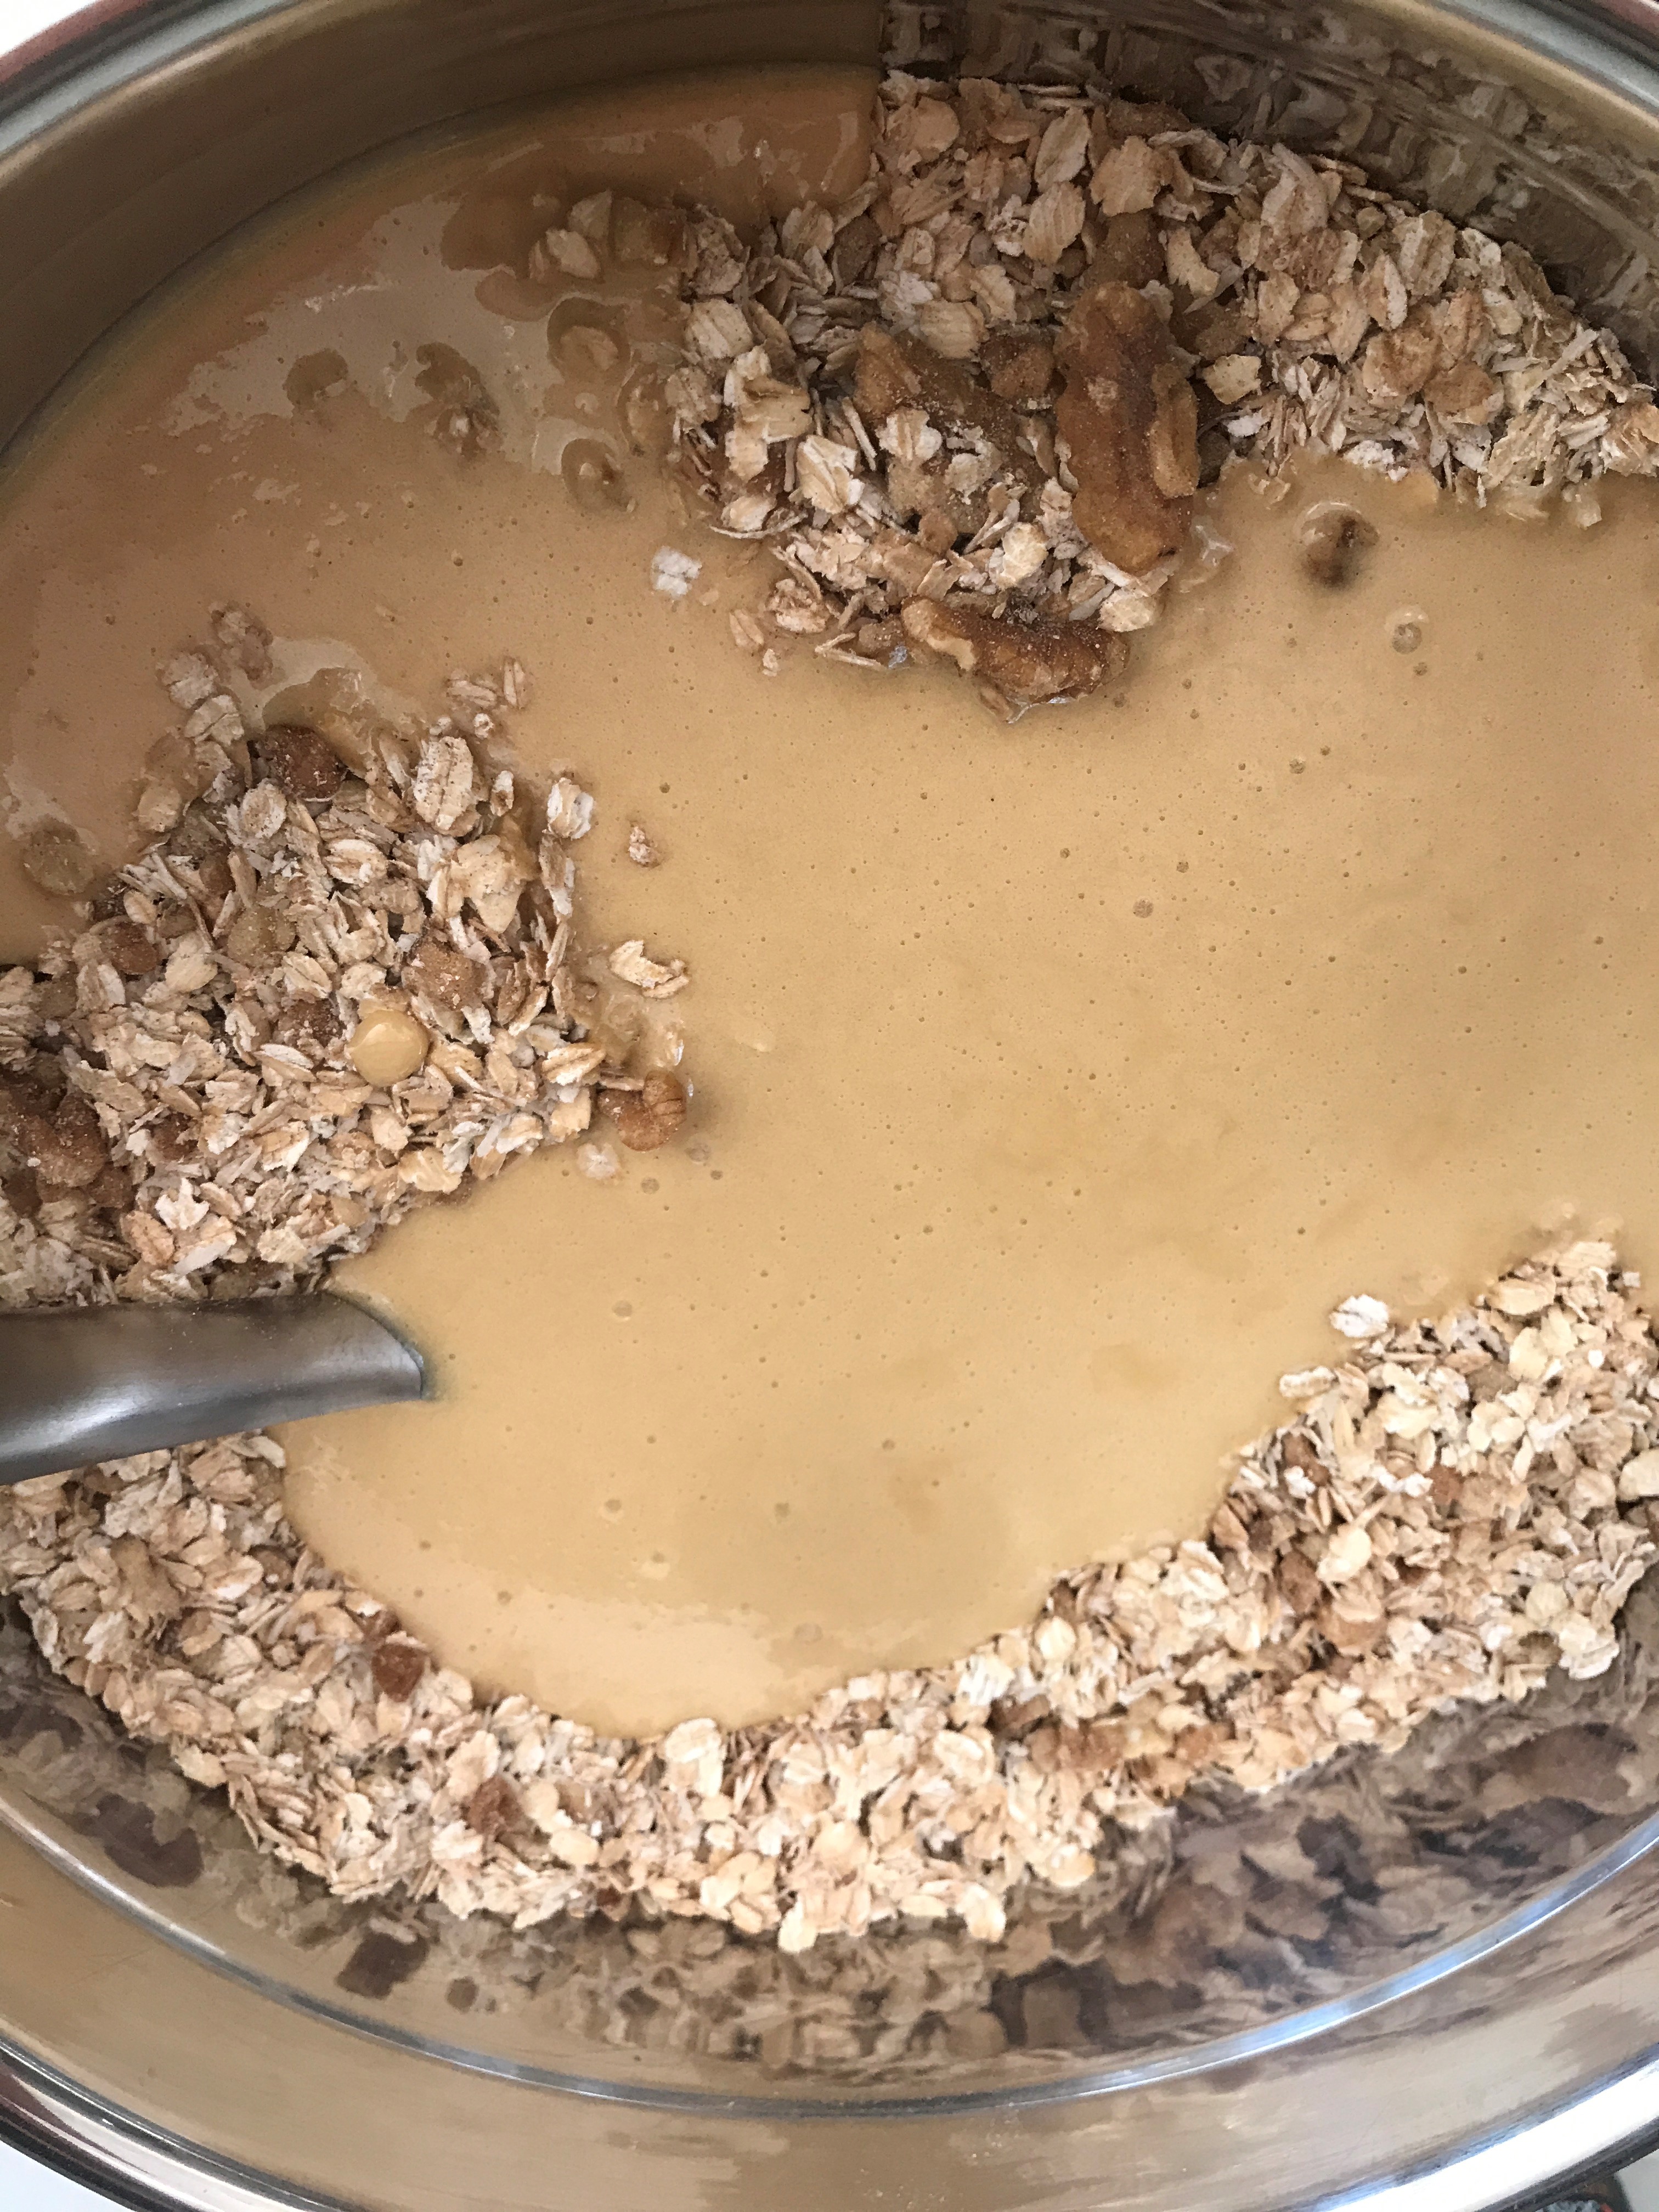
Pour the maple-malt-cacao-butter over the oat-nut mixture and stir to coat evenly.

Pour maple-malt-cacao-butter over oat-nut mixture

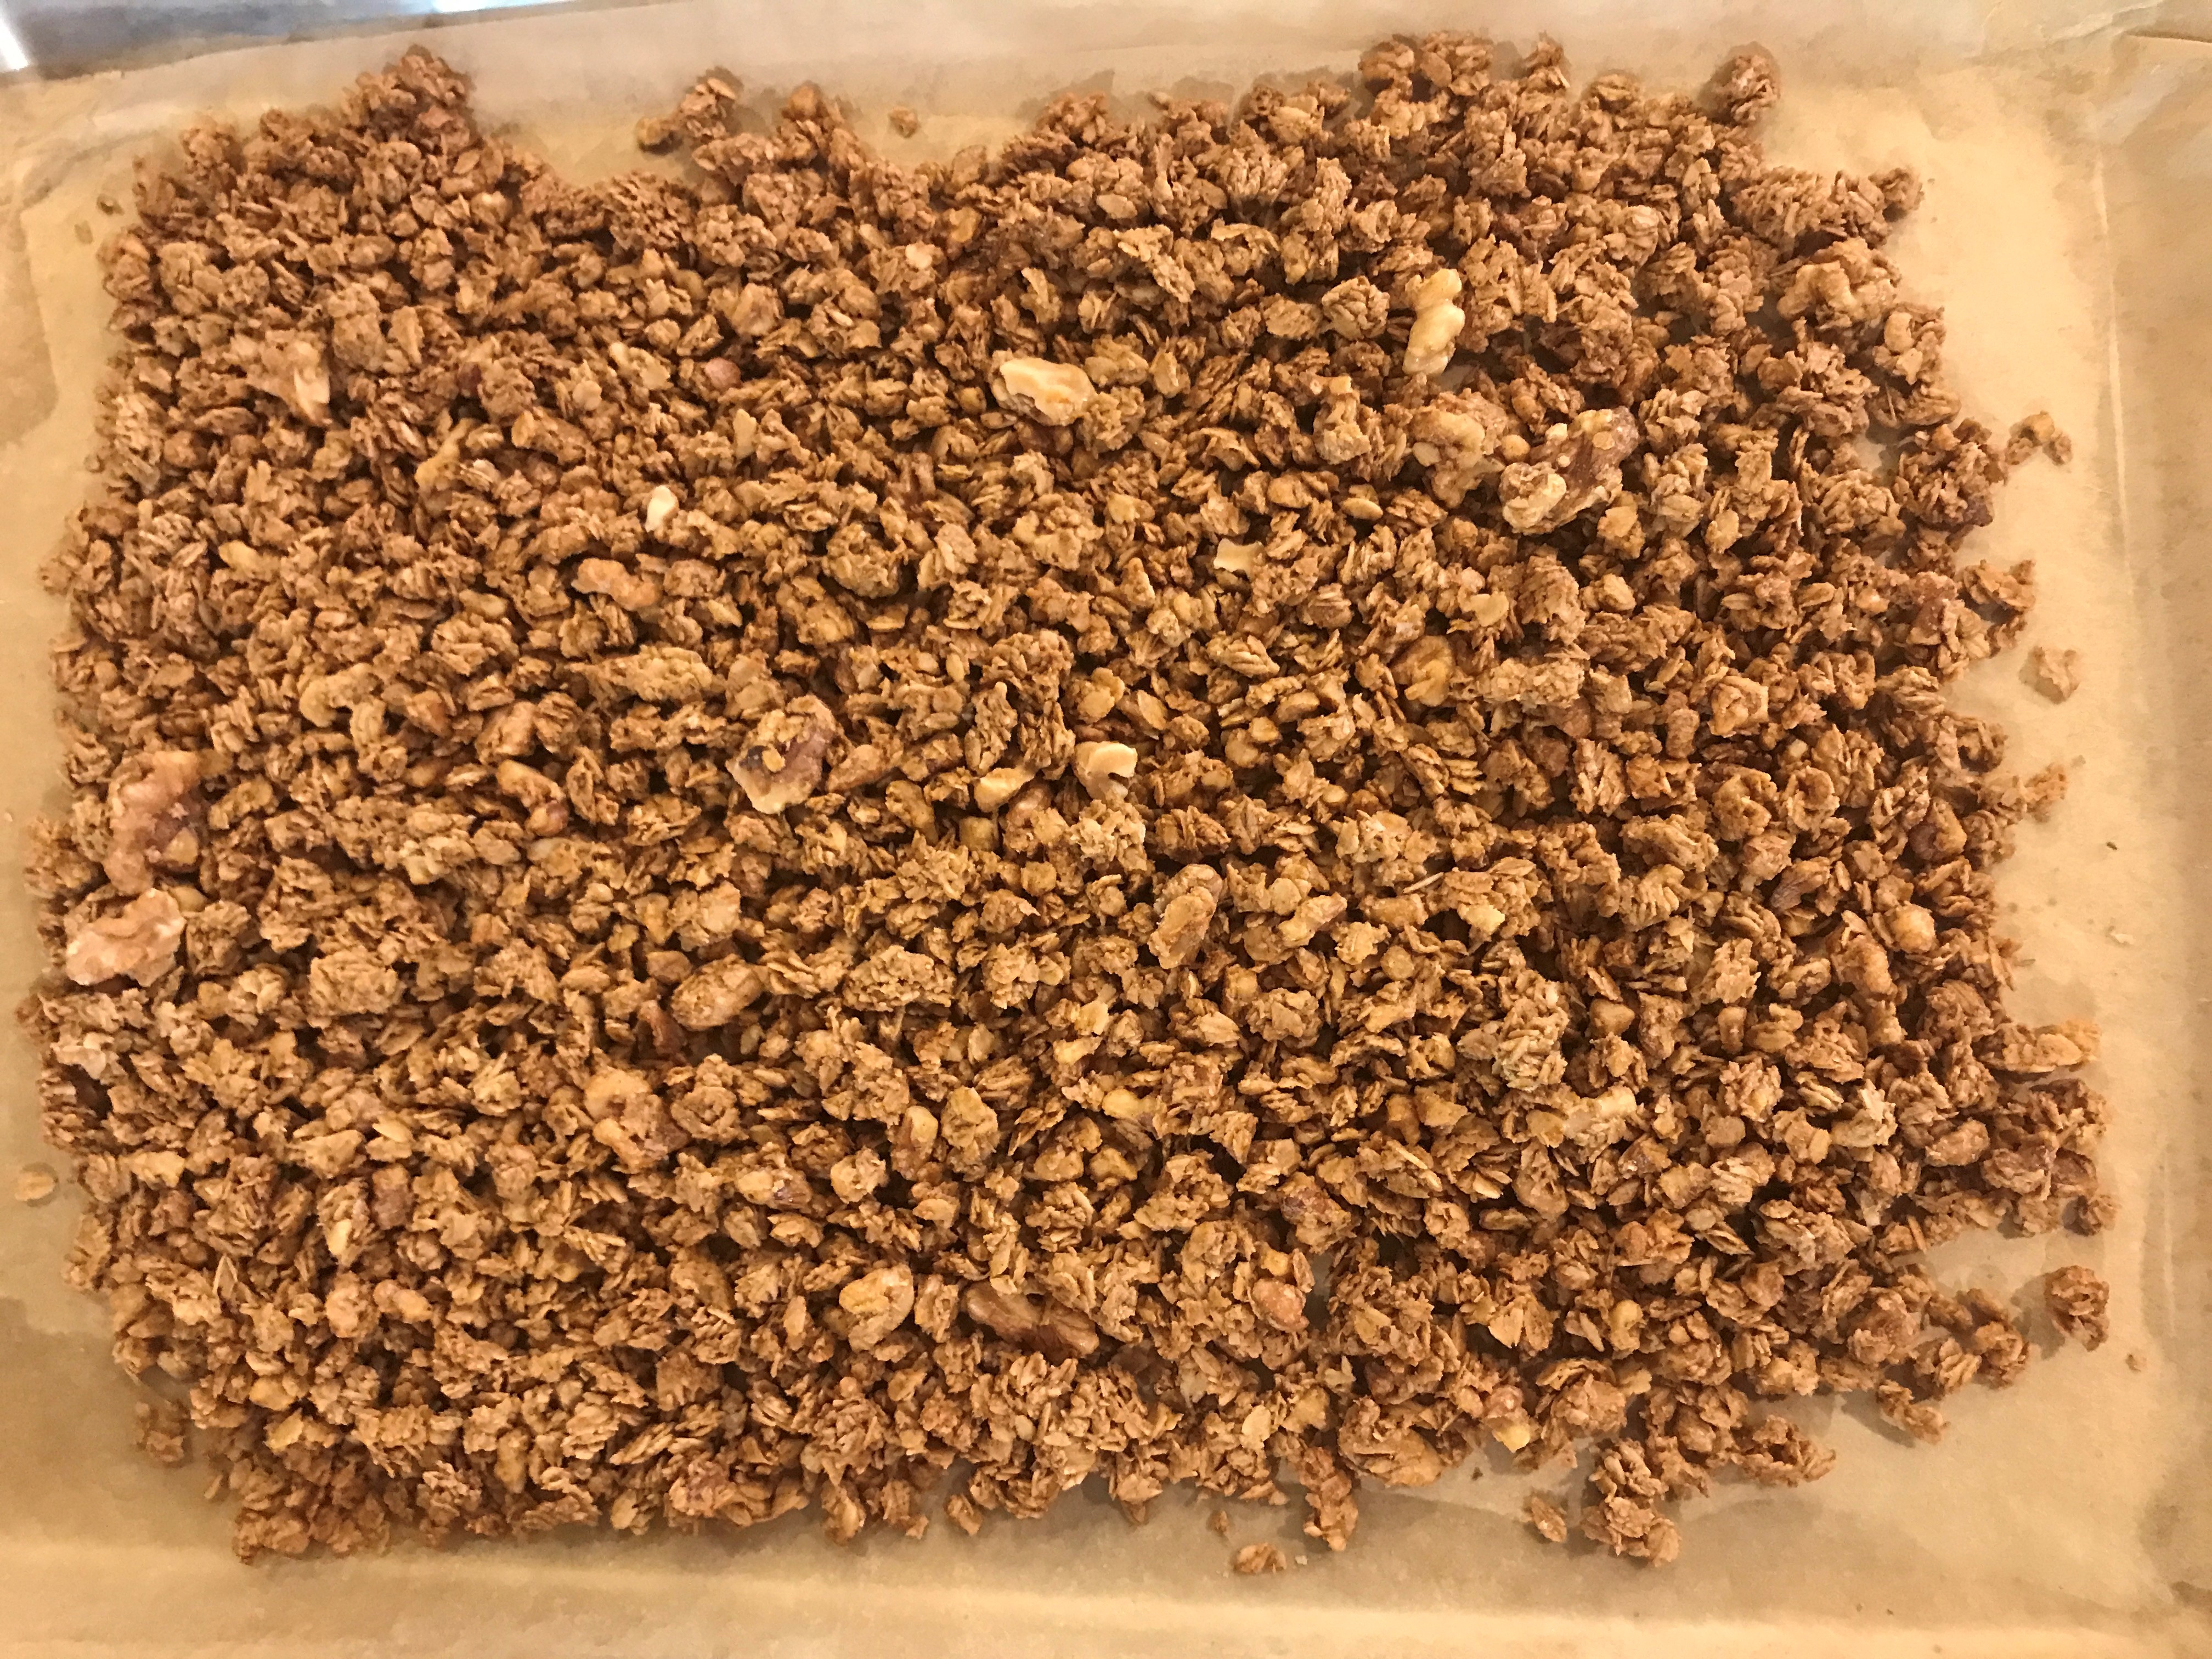
Spread evenly on the parchment-lined baking sheets.  Don't wash the bowl - you'll use it later.

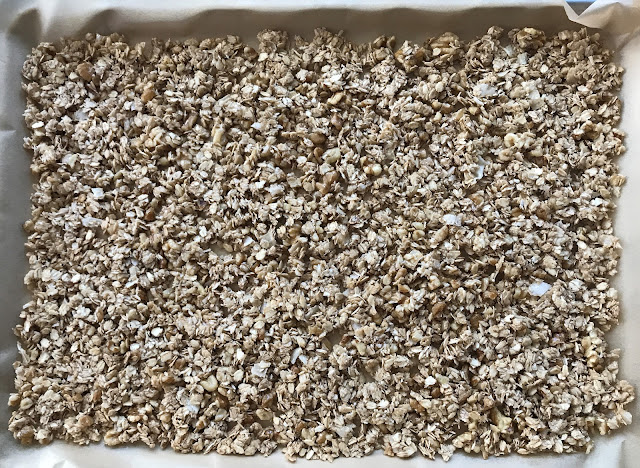
Spread evenly in parchment-lined sheet pan


Bake, stirring every 15 minutes, for 30 minutes.  REDUCE THE HEAT TO 300F (275F convection).  Continue baking for another 30 minutes, stirring every 15 minutes, until golden brown.  Rotate the pans and swap oven racks so they brown evenly.  I KNOW...all this stirring and swapping is a pain, but it does end up more evenly toasted that way.  I tried stirring every 20 minutes and nearly burned them! 

When I make this, I make a double recipe using 4 sheet pans, and I rotate them so that each pan spends time on each rack.  I end up with 3 half-gallon jars of granola. If you only have one oven rack you should halve the recipe and use one sheet pan.

If you don't like big chunks, break them up as you stir.  People who eat granola out of hand as a snack, probably prefer chunks, but my husband eats it with yogurt and he doesn't like chunks.  I break them up.

In my oven it took 1 hour, in my sister's oven 30 minutes.

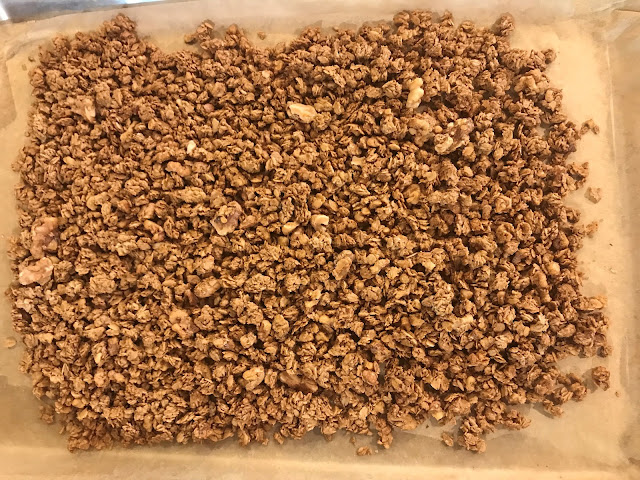
Baked oat-nut mixture


Cool on the sheet pans. 

Transfer back into the bowl you used to mix it together.  Add fruit and stir to combine.  If you add the fruit before you bake it, the fruit will burn.  

Transfer to a glass container with a lid.  It should keep for 2 months in a cool dark place (cabinet or basement).  Don't store it in an open container, or it will lose its crispness.

*NOTE:  If you can find chopped dates covered with coconut or some other powdery substance you won't need to coat them in malt powder.  Malt powder is slightly sweet but loaded with nutrients that sugar does not have.  You can leave it out, or substitute another sweetener, like brown sugar or Swerve.  My sister leaves it out entirely.  I suppose...you could try coating the dates in coconut flakes...let me know if it works!

**You can use up to 2 cups coconut instead of some of the oats, but we prefer it with just oats.


RECIPE: MMT Ranch Dressing made without seed oils

RANCH is my husband's favorite dressing.  When we gave up seed oils, I had to find a way to make it without mayonnaise. 
 
Have you ever looked at the label for hidden Valley Ranch Dressing?  So many chemicals!  

 Source: Hidden Valley
 
If you make my original recipe with purchased mayonnaise, even if it's organic, it will still contain refined (rancid) oil, CAFO eggs, fructose, salt and MSG.  
 
For this recipe I use spreadable hollandaise, made with butter or ghee!
 
It is possible to buy organic sour cream without additives.  We use Organic Valley (Organic Custored Pasteurized Nonfat Milk, Organic Pasteuried Cream, Acidophilus and Fifidus Cultures, Vegetarian Enzyme).  Make sure the brand you use contains only cream and cultures.  Avoid Carrageenan!
 
Most Ranch Dressing recipes are made with buttermilk, but I rarely have that on hand so I use milk thickened with lemon juice.  If you make your own buttermilk, or buy buttermilk without additives, use that instead of the milk/lemon combination.  
 
Ranch Dressing without seed oils
Makes a scant 3 cups 
 
INGREDIENTS
 
1 cup spreadable hollandaise made with the following seasonings:
2 T. minced shallot or chives
2 T. minced fresh parsley
2 T. minced fresh dill
 
2 garlic cloves minced or grated using a microplane
  
3/4 c. sour cream, preferably homemade
1/2 c. whole milk
4 T. plus 2 t. fresh lemon juice
1 t. himalayan pink salt
opt: pinch cayenne

INSTRUCTIONS
 
Mix 4 T. lemon juice into the milk and let stand several minutes until milk thickens.

In a medium bowl, whisk together the seasoned hollandaise, sour cream, 2 t. lemon juice, salt and cayenne.  Add the thickened milk slowly until the sauce reaches the desired consistency.  You may not use it all.

Taste and adjust seasoning.  Cover and let sit 30 minutes for the flavor to develop.


Thursday, May 19, 2022

RECIPE: SPREADABLE Hollandaise you can use instead of mayonnaise

Earlier this year, we gave up seed oils because they're very high in omega-6.  We didn't want to give up mayonnaise, though, so I started making hollandaise and adding extra water to the emulsion.  When the hollandaise cooled, it was spreadable!  This is healthiest made with ghee, but if all you have is butter it's fine to use that instead.

Original recipe: Foolproof Hollandaise in 2 Minutes

If you don't have an immersion blender, here is another foolproof way to make hollandaise   

SPREADABLE Hollandaise

Makes 2 scant cups

INGREDIENTS

  • 1 cup ghee or unsalted butter (2 sticks)
  • 3 egg yolks, from medium or large eggs*
  • 3 T. cold water 
  • 2 T. lemon juice
  • 1/2 t. himalayan pink salt 
  • OPTIONAL seasonings - garlic, mustard, harissa, curry powder, whatever you would use to flavor mayonnaise!  In the photo above, I used 2T each of chives, dill, and parsley, and 2 cloves of garlic grated on a microplane.

INSTRUCTIONS

*WASH THE EGG SHELLS with soap and hot water.  Dry them, then separate the yolks.  Save the whites for another use.

In a small saucepan over medium heat, melt ghee or butter until foam subsides, about 5 minutes.

While the ghee/butter is melting, add the egg yolks, water and salt to a pint jar and get out your immersion blender.  If you're going to season the hollandaise, add the seasonings to the jar.

When the foam has subsided on the ghee/butter, pour it into a heat-proof pitcher.

Add the lemon juice to the jar with the egg yolk.

Insert the head of the immersion blender into the pint jar and turn it on.  With the motor running, slowly pour the hot ghee/butter mixture into the yolks.  The acid and heat will perfectly cook the yolks!

Taste and adjust seasoning.

Refrigerate until cold.  

If it's still too stiff to spread, let it come back to room temperature and add 1-2 T warm water.  Mix thoroughly and refrigerate.  If you increase the water when you're making it, it might end up being too liquidy.  I think it depends on the egg yolks - sometimes 3 T. is perfect, sometimes I need to add more water later. 


Tuesday, January 25, 2022

RECIPE: Easy Keto (grain free) Egg Bites with Spinach and Sun Dried Tomatoes

 I've been meaning to make these for YEARS, and finally got around to it.  They are quick, easy, versatile, and tasty!

Original recipe: Keto Breakfast Egg Bites

I changed the recipe to use what I had on hand, and you can, too!  If you don't have spinach, use avocado, peas, or sauteed onions.  If you don't have sun dried tomatoes, use cherry tomatoes, prosciutto, or sauteed green peppers.  If you don't have cream cheese, use Boursin.  Whatever you would put in an omelet, you can put in these egg bites! 

I baked them in our convection toaster oven.  I made one batch using the pan with hot water, and another batch without it, and couldn't tell any difference.  Ergo, if you have a convection oven, you don't need the pan with the water. 

To insure I could unmold them, I used a silicone mini cupcake pan.  If you use a metal pan, I have no idea whether you'll be able to get them out of the pan!  

Silicone is floppy, so I placed the silicone pan on an enamel pan for support.  The recipe makes 24, so I baked them in two batches.

Easy Keto Egg Bites 

with Spinach and Sun dried Tomatoes


Makes 24 SMALL (1.75") egg bites.

Ingredients:

  • 6 medium-large eggs
  • 1 c. shredded cheese (I used cheddar), divided
  • 1/4 c. cream cheese, quark, or cottage cheese
  • 1/2 c. frozen spinach, thawed, squeezed dry and minced
  • 1/4 c. sun dried tomatoes in oil, OR roasted red peppers, minced
  • 1/2 t. himalayan pink salt
  • 1/4 t. cayenne

Instructions:

Preheat the oven to 300F. 

Place the eggs, 1/2 cup of grated cheese, cream cheese, salt and pepper in your blender jar and blend on high for 20 seconds until light and frothy.

If you aren't using a silicone cupcake pan, put about 1/4 t. of oil from the sun dried tomatoes in each of your pan's depressions.  This isn't necessary if you use a silicone pan.

In each depression, put 1 t. chopped spinach, 1/2 t. sun dried tomatoes, and 1 t. grated cheese. 

Fill each depression almost all the way to the top.  In the photo above, I added a sprinkle of cayenne to the top because we like spicy! 

Bake for 30 minutes, or until the center of the egg bites are just set.

Remove from the oven.

Invert the pan and pop the bites out! 

We like these with hummus, or hollandaise


The only photo I have of the cooked bites was taken at a picnic.  You can see them on the right, next to the chicken salad and meatballs we served them with.  The sauce is harissa hollandaise:


Friday, June 4, 2021

RECIPE: Scrambled Eggs with Senposai and Chive Blossom Hollandaise

Here's another quick recipe using SENPOSAI!  It uses only one pan, and dinner was on the table in 30 minutes. If you make the hollandaise fresh, add the egg whites to the scrambled eggs.

Scrambled eggs are my last-minute solution to the  'oops, I forgot to plan dinner' dilemma.  If I have spinach or arugula in the fridge, I usually add it to the eggs, so I decided to try the recipe with senposai.  As you can see, we like a high senposai-to-eggs ratio.  Feel free to use less. 

After dinner, my husband declared he was a senposai fan!  

The next day, he used the leftover eggs in an open-faced sandwich, layered between ham and cheese and then baked until the cheese melted.

The hollandaise is optional, turning the meal into a deconstructed Florentine Eggs Benedict.  I made it because I had chive blossoms that needed to be used, and we now use cold hollandaise instead of 'mayonnaise'.  It was so good I'm making a second batch before the chive blossoms are all gone.

Scrambled Eggs with Senposai and Chive Blossom Hollandaise

Serves 4

Ingredients

  • 3 T. ghee
  • 2 cups chopped onions (1 large or 2 medium)
  • 4 cups chopped senposai, including the stems
  • 1.5 t. himalayan pink salt
  • 1 t. powdered jalapeno, cayenne or black pepper to taste
  • 1/2 t. cumin, either ground or seeds, your choice
  • 12 eggs, beaten to combine (I use an immersion blender for this)
  • Chive Blossom Hollandaise either freshly made or at room temperature

In a large saute pan, melt 1 T. ghee over med-high heat and saute the onions and senposai stems, stirring occasionally until the onions are dark brown on the edges.  I add the onions first and let the senposai stems steam on top of them until the onions start to brown.


If you stir too often, the onions will cook through before they brown.  If the heat is too low, they won't brown at all.  You want them nicely browned but not mushy.  This will take 10-15 minutes.


I clean and chop the senposai leaves while I'm waiting for the onions to brown.

If you're going to make the hollandaise fresh, remove the pan from the heat and make the hollandaise now.

Return the onions to medium-high heat.  Add 1 T. ghee to the pan, add the senposai leaves and cook for about 2 minutes until they're wilted but still bright green.  Don't overcook them as they will continue to cook after you add the eggs.


Season with salt, pepper, and cumin.

Add the last tablespoon ghee to the pan.  Add the beaten eggs and reduce the heat to medium.  Stir constantly until the eggs are half coagulated, 3-5 minutes.  

Reduce the heat to medium-low and stir until they're creamy, another 3 minutes.  There should still be a little moisture in the pan - don't cook them until they're dry!


The pan I use is enameled steel, made by Chantal.  If I cook the eggs on medium or medium-low they do not stick!  You can see in the photo below, they are not stuck to the pan.  

Even if they did stick, I would not use a non-stick pan.


Serve drizzled with hollandaise and sprinkled with additional chives and blossoms.


RECIPE: Easy Chive Blossom Hollandaise

We now use hollandaise instead of mayonnaise, since I've figured how to make it quickly and easily.  

Hollandaise is not typically spreadable when cold, and it's impossible to reheat, so most recipes make a small batch to be used immediately while still warm. I make a big batch, and use a little more liquid than normal so that it's spreadable when cold.

Using an immersion blender, it comes together in minutes, and has never failed me!

Original recipe: Foolproof Hollandaise in 2 Minutes

Chive Blossom* Hollandaise


 Makes 2 cups (1 pint)

Ingredients

  • 3 egg yolks
  • 1 T. lemon juice
  • 4 T. water
  • 1/2 t. himalayan pink salt
  • 2 sticks butter
  • 1/4 cup each minced chives and chive blossoms*
  • Optional: pinch of ground cayenne or hot sauce

Scrub the egg shells before separating the eggs.  Save the whites to add to your next batch of scrambled eggs.

Combine the yolks, water, lemon juice and salt in the bottom of a pint jar.

Add the chives and chive blossoms.

Melt the butter in a small saucepan over high heat, swirling constantly, until the foaming subsides.  Transfer to a 2-cup heat-proof liquid measuring pitcher, either stainless steel or borosilicate glass.

Place the head of the immersion blender in the jar and turn it on.  With the blender running, slowly pour the hot butter into the jar until all the butter is added.  Continue blending until it's thick and creamy.  

When it's hot, it will be pourable.  It will thicken as it cools. When it's cold it will be spreadable.

NOTE: adjust the amount of water, depending on your intended use.  Use 1 T. if you're going to consume all of it hot, use 4 T. for spreadable when cold, and use 2-3 T. for a texture that's thicker when warm but needs to come to room temperature to be spreadable.   

* You can use other herbs and seasonings!  I've made garlic hollandaise, lovage hollandaise, harissa hollandaise, and lemon hollandaise by using 2 T lemon juice and 3 T. water.  Use your imagination!


RECIPE: How to Clean and Prepare Senposai

It occurred to me that it might be helpful to document how I prepare senposai for cooking, to show how easy it is, much easier than any other green!

How to Clean and Prepare Senposai


First, I rinse each leaf under running water, removing any dirt caught in the center rib.  The leaves are flat and easy to clean.

I stack the rinsed leaves in my salad spinner.  One full 'load' is the right amount for 4 servings.

If the leaves are really dirty, I will fill the spinner and give them a second rinse.  If they're clean, as they have been, I spin them dry.

Next, I remove the center rib.  For some recipes I reserve the ribs, for others they go on our compost pile. 

The plants are young now and the leaves fit easily in my spinner.  As the leaves get bigger, I remove the ribs before I spin the leaves, and I cut the leaves in quarters so they'll fit in the spinner.

Compare this process to cleaning curly kale for instance - I rarely cook curly kale because it's so hard to get the dirt out of the crevasses!  The only green that's almost as easy to clean as senposai is russian kale which is also flat and mostly crevasse free, except for the ruffles around the edges.


Most of my recipes call for chopped senposai.  

Once I've removed the ribs, I stack the leaves according to their size.  The smaller leaves I cut in half lengthwise and stack both halves.  Then, I slice them (this is much easier with a very sharp knife!) crosswise.


The larger leaves I quarter lengthwise, stack all four, and then slice them crosswise.  If the leaves are really big, cut them into 2" strips.


Once all the leaves are sliced crosswise, I chop the mound into roughly 1" pieces. 


If I'm going to use the ribs, I chop them coarsely.


Thursday, June 3, 2021

RECIPE: Creamy Senposai and Optional Chicken Stew

There is SENPOSAI in the farm store!!!  

I LOVE senposai!  Described as a "cross between cabbage and komatsuna (Japanese mustard spinach)", senposai, which translates as Thousand Wonder Vegetable, tastes more like sweet cabbage than mustard greens or spinach.  

It looks like a smaller version of collards, which makes it easy to wash and de-rib, but it cooks MUCH faster, in minutes as opposed to half an hour, and it's more toothsome than spinach or other salad greens.  I use it wherever I might otherwise use spinach or kale.  It freezes beautifully, both raw and blanched.


Here's a recipe I concocted for dinner tonight using as many farm-store vegetables as possible.  It's sort-of an UN-recipe because you can substitute most of the ingredients for something else.  It uses only one pan and it's ready in 10 minutes, once you've done all the prep.  I had dinner on the table in 30 minutes!

Creamy Senposai and Chicken Stew

Serves 4 

Ingredients

  •  4 T. bacon fat, lard, or ghee (I used ghee made from farm milk)
  • 1 c. chopped onions (I used green onions from the farm store, both the green and white parts)
  • 3 cups chopped senposai (I remove the ribs, slice thinly, then cut into 1" pieces)
  • 2 cups cooked chicken, cut or torn into small pieces OR 3 additional cups chopped senposai
  • 2 cups liquid - broth, milk, or water (I used chicken broth, made with farm chickens)
  • 3 T. flour (I used sweet rice flour)
  • 1 cup shredded cheese (I used gouda, but any melting cheese will work)
  • 1 t. Himalayan pink salt
  • 1/2 t. cayenne (optional, or you can use freshly ground black pepper)
  • 1/8 t. freshly grated nutmeg or 1/4 t. ground nutmeg
  • Chopped chives and chive blossoms for garnish (or sage blossoms).

Melt 1 T. fat over medium heat and saute the onions until translucent; 4 minutes for yellow onions, 1 minute for green onions.


Add the senposai and saute until wilted but still bright green, 1-2 minutes.  Remove to a bowl and reserve.


Melt the remaining 3 T. fat over medium heat and stir in the flour.  Whisk until medium brown, about 2 minutes.  Reduce heat to low and add the liquid, stirring vigorously with the whisk to prevent lumps.  Raise heat to medium and cook until thickened, about 3 minutes.


Stir in chicken and cheese, then stir until the cheese melts, about 1 minute.  Don't raise the heat or the cheese will separate.

Add the seasonings and stir to combine.


Add the reserved senposai and stir until heated through.  If it's too thick, add a little water.


Serve, garnished with chives and their blossoms.


You can serve this over toast (creamed chicken on toast), or with rice or pasta, but they're no longer part of our diet so we ate it neat/Paleo as stew.  We both went back for seconds!  If you replace the chicken with senposai, you can serve it as a side dish.


Here are some additional senposai recipes you can try: