Wednesday, November 29, 2023

RECIPE: Brussels Sprouts, Chestnuts & Mushrooms in Caramelized Onion Cream

This is my must-have Thanksgiving dish!

I developed this recipe decades ago!  I used to make it with just mushrooms but, when I met my husband and discovered he doesn't like mushrooms, I replaced them with chestnuts.  

Since then, he has learned that he can tolerate black trumpet mushrooms so I use them now.  If you like mushrooms and chestnuts, feel free to use them both, or leave them out entirely if you don't like either.

When I use black trumpet mushrooms, which aren't in season in November, I buy them dried and use only the liquor, since they've given all their flavor to it.  

For Thanksgiving, I usually double the recipe.

Brussels Sprouts, Chestnuts & Mushrooms in Caramelized Onion Cream

Serves 4-6

INGREDIENTS

  • 6 T. butter or ghee 
  • 1.5 pounds small brussels sprouts (I like Whole Foods Petite Brussels Sprouts, frozen), or large brussels sprouts halved
  • 1/2 pound roasted and peeled European chestnuts (do not use Chinese chestnuts)
  • 1 pound of shiitake or crimini mushrooms, quartered OR 1 ounce dried black trumpet mushrooms
  • 3 pounds of yellow onions, thinly sliced
  • 1.5 - 2 cups heavy cream
  • salt and pepper
  • OPTIONAL 1/2 c brandy

EQUIPMENT if you're using black trumpet mushrooms:

  • Nut milk bag, coffee filter, or muslin
  • small bowl

INSTRUCTIONS

If you're using dried black trumpet mushrooms, put them in a bowl and pour 1 cup of boiling water over them.  Let them steep while you cook the onions and the brussels sprouts; then, holding the nut milk bag over a different bowl, ladle the soaking liquid through the nut milk bag into that bowl, leaving the mushrooms and any grit they released in the first bowl.  Nut milk bags are made from a very fine mesh and should catch any grit the mushrooms released.  If you don't have a nut milk bag, you can use a coffee filter or even a piece of fine cotton fabric.  Reserve the soaking liquid and toss the mushrooms.

In a large saute pan, melt 3 T fat over medium-high heat and add the sliced onions.  Cook them, stirring only occasionally, until they turn a deep medium brown.  By cooking them on med-high, they should turn brown before they disintegrate.  Remove them to a bowl.

If you're using shiitake and/or crimini mushrooms, add them to the pan and saute until browned.  Remove them to the bowl with the onions.

Melt the remaining 3 T. fat in the same pan, on medium-high heat, and add the brussels sprouts.  Add 1 cup of water, cover the pan, and cook until the water has disappeared, about 10-15 minutes.  Remove the lid and let the sprouts brown in the fat.

If you're using black trumpet mushrooms, strain the soaking liquid from the mushrooms and add it to the pan with the brussels sprouts.  If you're using the brandy, add it to the pan now.  Cook until reduced to a glaze.  Reduce heat to medium.

Add 1 c. of cream to the pan, then the chestnuts, then the onions.  Stir everything together.  Add additional cream if necessary to create enough sauce to coat the vegetables.  Bring to a simmer over medium heat.  Serve! 

If you aren't going to serve this immediately, reduce heat to very low and stir occasionally.  When I take it to a potluck, I transfer it to a Le Creuset enamel cast iron pot that I have preheated in a 200-degree oven, and then wrap the pot in a towel.  It will stay hot for hours! 

PHOTOS

NOTE: In the photos below, I am making a double recipe in a 14" saute pan using black trumpet mushroom liquor.  I did not use the brandy.

In a large saute pan, melt 3 T fat over medium-high heat and add the sliced onions.  Cook them, stirring only occasionally, until they turn a deep medium brown.  By cooking them on med-high, they should turn brown before they disintegrate.  Remove them to a bowl.

Sliced onions before sauteing

 
Caramelized onions


Remove caramelized onions to a bowl.

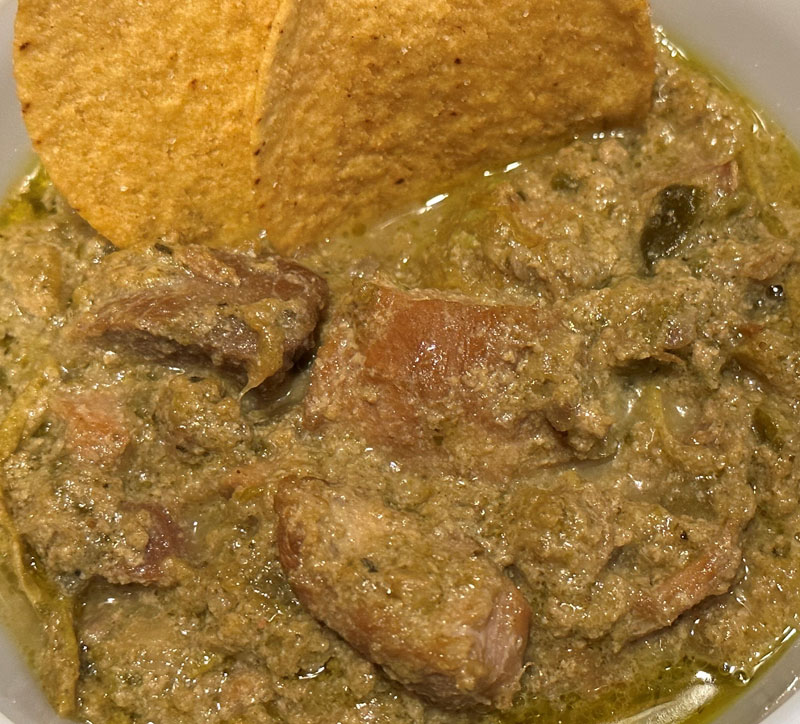
Caramelized onions, black trumpet mushroom liquor, Spanish chestnuts

Melt the remaining 3 T. fat in the same pan, on medium-high heat, and add the brussels sprouts.  Add 1 cup of water, cover the pan, and cook until the water has disappeared, about 10-15 minutes.  Remove the lid and let the sprouts brown in the fat.

Frozen brussels sprouts into the same pan in which the onions were caramelized

 
Steamed and then sauteed brussels sprouts

If you're using black trumpet mushrooms, strain the soaking liquid from the mushrooms and add it to the pan with the brussels sprouts.  If you're using the brandy, add it to the pan now.  Cook until reduced to a glaze.  Reduce heat to medium.

Black trumpet mushroom liquor reduced to a glaze

Add 1 c. of cream to the pan, then the chestnuts, then the onions.  Stir everything together.  Add additional cream if necessary to create enough sauce to coat the vegetables.  Bring to a simmer over medium heat.

Add 1 cup cream to the pan.

Add chestnuts to the pan.

 
Add caramelized onions to the pan.

Add more cream as necessary to bathe all the vegetables.

Bring to a simmer over medium heat, then serve!


Brussels sprouts and chestnuts in caramelized onion cream.


Monday, September 11, 2023

RECIPE: How to Freeze Green Onions/Scallions

When there aren't enough yellow onions or leeks in our farm store, I use green onions or scallions instead.  

I also freeze them for use in stock (instead of leeks) and things like stew, egg salad, and these vegetable pancakes.

How to Freeze Green Onions/Scallions

Scallions ready for the freezer

Instructions:

Choose your scallions carefully - the larger ones are MUCH easier to wash and trim!

WASH the scallions under running water.

Wash scallions under running water


If the roots are attached, slice them off with a sharp knife and remove any discolored leaves.  

If the roots are very dirty, it's best to remove them in the sink and then rinse them again.

Cut off dirty roots in the sink and rinse again!

Cut off root ends and remove discolored leaves.

DRY with a dishcloth or paper towels.


SLICE into manageable lengths (I slice them to fit in my vacuum sealer bags).

Slice the scallions into manageable lengths.

Gather them up and stuff them into a recloseable bag. 

Scallion greens in vacuum sealer bag.

Scallion white and light green in vacuum sealer bag. 

Remove as much air as possible and seal.

Remove as much air as possible and seal.

FREEZE.


When you use them, they are easy to slice WHILE STILL FROZEN into whatever length you need for your recipe, and they will discolor less if you freeze them in bigger pieces.


I freeze the bottom and light green parts separately from the dark greens because that's how I use them.

NOTE: Before you call me out on using so much plastic, my freezer is FULL of glass containers.  When there is no room left, I do use plastic, but I wash and reuse the bags until there is nothing left.  You CAN freeze these in glass containers, if you have room in your fridge for them.  If you don't have a vacuum sealer, you can use a recloseable bag and a straw to remove as much air as possible.


RECIPE: GF Vegetable Pancakes - Carrot, Arugula, Kale, Chard, Etc...

I have made these carrot pancakes many times, and I've added different vegetables to them based on what I have on hand.  They are so easy, and so versatile!  

My husband's favorite is arugula, red onion and garlic, my favorite is red chard, leek, and garlic.  

The ones I made with baby kale, garlic scapes, and onion were 'toothsome' which I liked, but my husband didn't, so experiment with your favorite vegetables.  

We eat these 'plain', and also use them as a base for garnishes like arugula and smoked salmon (shown below), or salami, cheese and tomatoes (shown at the bottom).

 GF Vegetable Pancakes - Carrot, Arugula, Kale, Chard, Etc...

Makes 30 small pancakes.  Serves 4-6

Ingredients:

  • 7 SMALL eggs, or 6 large eggs plus 1 egg yolk, beaten to blend (the extra yolk adds tenderness)
  • 3 CUPS minced vegetables* (see below for flavor suggestions)
  • 6 T. chopped herbs (I used frozen), or onions
  • 6 T. flour (I've used quinoa, rice, and chickpea - use whatever you tolerate)
  • 1-2 teaspoons himalayan pink salt**
  • OPTIONAL: 1 t. cayenne or black pepper
  • 6 T. ghee, lard or tallow


Instructions:

Mix the vegetables with the herbs and flour.  Add the eggs and salt and mix to combine.  Set aside for at least 15 minutes to allow the flour to hydrate.  (I have let it set as long as 2 hours).

Kale pancakes frying in an omelet pan

In a shallow frying pan (I use an omelet pan) melt 1 T fat on medium.  Using a tablespoon, drop the carrot mixture into the hot fat.  Cook until medium brown, about 1 minute, then flip and cook another minute.  Remove to paper towel lined plate. Repeat with remaining batter, adding fat as needed so they don't stick (you need quite a bit of fat to prevent sticking - don't be stingy!).

Serve with mayonnaise, ranch dressing, sour cream or yogurt, alongside a green salad.

Kale pancakes with pimiento berbere mayo

*How to prepare the vegetables:

These pancakes cook very quickly, so whatever vegetables you use should be finely chopped, or partially cooked.  When I use root vegetables like carrots or parsnips, I mince them in the food processor.  When I use hardy greens like kale or chard I blanch or saute them first, and then chop.  If I add onions, I either saute them, or mince them.  Tender greens like arugula I just slice thinly.

WE like these better when I include a little carrot with the other ingredients.  

**SALT: When I use root vegetables, I use 2 t. salt.  When I use only greens, then 1 t. salt is enough.  The first time you make these, fry one, taste it, and adjust the salt to your preference.

Flavor suggestions:

  • 1 c. minced carrots, 2 c. thinly sliced arugula, 1/4 c. minced red onion, 2 cloves minced garlic
  • 1 c. minced carrots, 2 c. blanched red chard, 1 cup sauteed leeks, 2 cloves garlic, 1 t. cayenne
  • 1 c. minced carrots, 2 c. blanched kale, 1/2 cup sauteed onions, 1/2 c. garlic scapes, 1 t. cayenne
  • 3 cups of scallion greens, 1 T. black sesame seeds or black onion seeds
  • 1 c. minced carrots, 2 c. blanched spinach, 1/2 c. roasted red peppers OR sun dried tomatoes


Here's how my husband like to eat them:

Arugula pancakes with salami, melted cheese, and tomatoes.

NOTE TO SELF:

To use as few dishes as possible:

Use a 4-cup measuring pitcher to measure the vegetables, and dump them into a mixing bowl.  Add the flour and salt and mix to combine.

Arugula, red onion, cayenne, garlic, and chickpea flour

Break the eggs into the measuring pitcher and beat to blend.  Pour over the vegetables and mix to combine.

Eggs beaten to blend, scallions mixed with flour and sesame seeds


Cooked pancakes draining on paper towels.


Wednesday, July 26, 2023

RECIPE: Peas with Shallots and Mint

I have the BEST friends!  One of them gave me some French grey shallots, the other gave me some mint.   I had just picked some peas so I googled for a recipe and found one that I could modify.  This was the result and it was so good we gobbled it up!


Peas with Shallots and Mint


Serves 4

INGREDIENTS

  • 4 T. ghee
  • 4 cups of shelled peas
  • 4 T. shallots slice very thin (divided)
  • 1/4 c. mint leaves, sliced very thin
  • zest from one lemon, thinly sliced
  • Salt and pepper to taste

INSTRUCTIONS

In a medium saute pan, cook the peas in salted water until they are almost cooked.  I like them soft, you may like them al dente.  Cook them the way YOU like them!  Pour into a strainer and discard the water.

Wipe out the saute pan and add the ghee.  Heat over medium-high and add half the shallots.  Watching them carefully, saute them until they are golden brown.  Remove from pan from the heat and quickly remove the shallots with a slotted skimmer.  Place them on some paper towels to crisp.

Put the pan back on the heat and add the remaining shallots.  Gook briefly just to soften them.  Add the peas and half the mint and stir until they are heated through.  Remove from the heat and add the rest of the mint and the lemon zest.  


Season to taste with salt and pepper.  Serve sprinkled with the crisp shallots.


Monday, April 24, 2023

RECIPE: Keto Moroccan Nachos

My husband asked me what was for dinner.  When I said, "Moroccan Nachos,"  he said, "What?  Is that a joke?"  No, it wasn't a joke, and they were delicious!  They were so good we had them three days in a row!  

The original recipe is labor intensive, so I simplified it.  I used prepared salsa and stirred the honey and harissa into it, and rather than guacamole I served sliced avocado.  It might be better if you follow the original recipe, but I loved the fact that I didn't have to do all that extra work.

These do not keep - the chips get soggy - so make only enough to eat right away.  I make a full recipe of kefta but only use half the first day, and use the rest the second day.. 

Original recipe: Moroccan Nachos

Keto Moroccan Nachos


Serves 3-4

For the Salsa

  • 1 cup of your favorite salsa, purchased or homemade (I use Kitchen Garden Farm
  • 1 T. honey
  • 2 t. ground cumin
  • 2-4 t. harissa, depending on how much heat you can tolerate

For the Kefta

  • 1 pound ground beef or lamb (I use lamb)
  • 1 small onion, minced or grated with juices reserved
  • 1/2 packed cup flat-leaf parsley, finely chopped
  • 1/2 packed cup cilantro, finely chopped
  • 1/2 packed cup mint leaves, finely chopped
  • 2 heaping t. sweet pakrika
  • 1 t. ground cumin
  • 1 t. himalayan pink salt
  • 1 t. cayenne or to taste
  • 2 T. ghee or olive oil
For the Nachos

For Serving

  • 1 c. sour cream
  • 1 avocado
  • sliced grape tomatoes
  • chopped cilantro leaves

Preheat the oven to 400F.

Prepare the kefta: Heat the fat in a large frying pan over medium heat.  Add the remaining ingredients and cook, breaking up the meat with a wooden spoon until it is no longer pink, about 7 minutes.  Make sure the meat is dry - if it's wet, it will make the chips soggy!   (This will keep in an airtight container in the fridge for 2 days)

Assemble the nachos: spread the chips on a baking dish in a single layer.  Top with the kefta, sprinkle with the onion, and add a layer of cheddar.  Bake until the cheese has melted, about 10 minutes.

Moroccan Nachos before baking

Moroccan Nachos after baking
 

While the nachos are baking, stir the salsa ingredients together.  Slice the avocado.

Remove the nachos from the oven and serve immediately with sour cream, salsa, sliced avocado, sliced tomatoes and chopped cilantro. (The original recipe instructs you to top the nachos with these extras, but we prefer to add them to our plate, to taste.)

Moroccan Nachos


Thursday, April 6, 2023

RECIPE:Seed-oil-FREE Mayonnaise made with Butter or Ghee

When we gave up seed oils last year, one of the first things I did was change the way I made mayonnaise.  Mayonnaise is where most seed oils entered our diet.  (OUR diet, not necessarily your diet.  You may be getting them from other sources.)  Having used this method for a year now, I've tweaked it a little so I'm creating a new post.  

The biggest change is that I now use duck egg yolks because they have more nutrition than chicken egg yolks.  Duck eggs seem to be more readily available here, but if they aren't available where you live then chicken yolks are perfectly fine.  NOTE: if you're sensitive to chicken eggs, it might be the white that's the problem.  My husband can have duck yolks, but he can't have duck whites.  If you can't tolerate either, you can use aquafaba.  I'll post a recipe using aquafaba the next time I make it.

The other change I made is to use a 3-cup wide mouth Ball jar instead of a pint jar.  Ball calls these 1.5 pint or 24 ounce jars.  I prefer them for this recipe because they're the same width as the pint jars, but they're taller so I can add seasonings without risking an overflow.  They're just tall enough that I can use 3 sticks of butter instead of 2 (12 ounces of ghee instead of 8oz) if I'm making a flavor we use a lot of, like the two shown below. 

I will usually make two of these jars - one plain and one seasoned.  

Here's my original recipe: spreadable hollandaise to use as mayonnaise

SEED-OIL-FREE MAYONNAISE Made with Butter or Ghee


Makes 3 cups

EQUIPMENT

  • 1 24oz wide mouth ball jar
  • Immersion blender
  • Small sauce pan
  • Small heat-proof pitcher, at least 12oz

INGREDIENTS

  • 3 duck egg YOLKS or 4 chicken egg YOLKS from WASHED eggs.
  • 3/4 t. himalayan pink salt
  • 5 T. water
  • 3 T. lemon juice
  • 12 ounces butter or ghee (3 sticks of butter)  
  • OPTIONAL SEASONINGS (choose ONE)
    • 1/4 cup roasted red bell peppers plus 1.5 t. berbere spice
    • 4 T. curry powder sauteed in 2 T. ghee or butter
    • 1 minced garlic clove, 1 T. each chopped dill, parsley, and chives
    • 2 T. Dijon mustard (or 2 T mustard powder mixed with 1 t. vinegar)
    • 1/4 cup grated horseradish
    • 1/4 cup harissa or to taste

INSTRUCTIONS

WASH THE EGG SHELLS with soap and hot water and dry them BEFORE REMOVING THE YOLKS!!  You must do this even if the shells look clean.

Separate the yolks into your jar, discarding the whites and the shells*.

Add the water, salt and optional seasonings.

Heat the butter or ghee in a small sauce pan until it's totally melted and small bubbles appear.

Pour the butter/ghee into the small pitcher.

Add the lemon juice to the yolks (they will start to cook the yolks so I add them at the last minute), DON'T add it to the hot fat, as it will foam up out of your pitcher!  Insert the immersion blender into the jar and turn it on.

With the immersion blender running, S_L_O_W_L_Y pour the melted fat into jar.  Raise the blender to the top of the liquid occasionally and then push it back to the bottom.  

When all the fat has been added, the mixture will still be very runny.  This is how it should be!  When it cools, it will be the consistency of mayonnaise.

Put the lid on the jar and transfer it to the fridge for 1-2 hours until cold.  

If it's still too thick, you can stir in warm water, 1 T. at a time, until it's the consistency you prefer.


*I throw out the whites, because my husband can't eat them, but I keep the shells because they're a good soil amendment for tomato plants. 


Wednesday, April 5, 2023

RECIPE: Chicken Breast with Cheese and Poblano in Manchego Crema

This recipe was developed by Cacique, a company that sells some of the ingredients.  Cacique isn't sold where we live so I made substitutions.  I also decided not to roll the breasts - I layered them in the baking dish with the cheese and chiles in between.  It worked, but it was hard to serve, so next time I may slice the breasts into small pieces.  

The flavor was phenomenal - we both loved it!

Original recipe: Chicken Roulade in Mexican Crema

Chicken Breasts with Cheese and Poblano in Manchego Crema

Serves 4-5

INGREDIENTS

  • 2 pounds boneless skinless chicken breasts 
  • 2 T. EVOO
  • 2 T. fresh lemon juice
  • 4 T. fresh cilantro chopped, divided
  • 2 T. ground cumin
  • 2 t. cayenne pepper
  • 2 cloves garlic, minced 
  • 2 t. himalayan pink salt
  • 10 oz melting cheese (I used mozarella) cut into 1/4" slices
  • 3 large poblano chiles, roasted, peeled, seeded* and cut into 1/4" strips
  • 1 cup sour cream
  • 1 cup chicken stock
  • 2 t. Dijon mustard (original recipe called for 1T, but I thought it overwhelmed the sauce)
  • 1 c. shredded Manchego cheese
  • Salt and pepper to taste 

INSTRUCTIONS

Preheat oven to 400F.

Pound the chicken breasts to 1/2" thick.  I had to cut the large pieces in half horizontally to do this.

Mix the chicken breasts with the olive oil, lemon juice, salt, 2 T. cilantro, cumin, cayenne and garlic.  Let the chicken marinate for 30 minutes.  Doesn't that look delicious?  The chicken is good even without the cheese, chiles and sauce!

Marinate the chicken for 30 minutes.

In a small shallow baking dish, lay half the chicken on the bottom, cover with the melting cheese and half of the poblanos, then layer the remaining breasts on top. My baking dish was 6" x 9"

Chicken, then cheese, then poblanos.

Chicken on the bottom, then cheese, then poblano, then chicken on the top.

Bake uncovered for 30 minutes until the chicken is cooked through.

While the chicken is cooking, puree the remaining poblanos and cilantro in a blender or food processor with the chicken broth and the Dijon mustard.  Bring to a simmer over low heat and stir in the sour cream.  Cook for 3 minutes.  Remove from heat and add the shredded Manchego.  Stir until melted.  Season to taste with salt and pepper.

Cover to keep warm until the chicken is ready.  Serve immediately over the chicken.

I served this with Blackened Cauliflower and it was a marriage made in heaven!

Blackened Cauliflower on the left, crema in the center, chicken breasts on the right.


* I process these in the fall and then freezer them, which greatly simplifies preparation time when I use them!

RECIPE: Blackened Cauliflower

Oh, my, is this delicious!  I'm sure the recipe will also work with root veggies.  (I tried it with broccoli and did NOT like it!)

The original recipe is from The New York Times.  I made it as written and I thought the smoke in the paprika overwhelmed the other spices, so I made some adjustments and we both liked my second effort better.  Less smoke and more spice!  Reduce the pepper flakes if you can't handle hot. 

We eat a LOT of vegetables, and one pound of cauliflower is barely one meal for us, so I tripled the recipe, which saves a huge amount on power consumption, especially since the recipe calls for such a hot oven.  It reheats beautifully - 10 minutes in a 350F toaster oven.

Original recipe: Blackened Cauliflower

Blackened Cauliflower

serves 6

INGREDIENTS

  • 3 pounds frozen cauliflower, defrosted (or 3 large heads, cored and separated into florets, about 3 pounds)
  • 4 T. EVOO
  • 1 T. himalayan pink salt
  • 1 T. onion powder
  • 1 T. garlic powder
  • 1.5 t. dried thyme leaves 
  • 1.5 t. sumac powder (preferably cured with salt)
  • 1.5 t. smoked paprika
  • 1.5 t. hot pepper flakes, or to taste (I used cobanero chili flakes)
  • freshly ground black pepper

INSTRUCTIONS

Preheat the oven to 450F.  Place rack in center of oven.

Mix the seasonings, excluding the black pepper, in a small bowl.

In a large bowl, toss the cauliflower with the olive oil.  Add the seasonings and mix to coat the florets evenly.

Transfer to a jelly roll pan (13" x 18"), using a rubber spatula to scrape every last bit of the seasoning onto the cauliflower, and spread the florets out evenly.

Grind the black pepper to taste over the cauliflower. 

Cauliflower ready for the oven.

Roast until nicely browned but not black.  In our oven, it takes 30 minutes, using frozen cauliflower.  When I left it in for 35 minutes, some of the edges were burnt.  My husband liked them but I don't like to eat burnt food!  

The original recipe recommends 35-40 minutes, using fresh cauliflower, and stirring halfway through.  

I served this with Chicken in Poblano Crema and it was a perfect combination!

Cauliflower on the left, poblano crema in center, chicken breast on right.


Monday, March 27, 2023

RECIPE: Creamy Spicy Pork Stew Soup with Coconut Milk, Poblano, Tomatillo

Last month, I ordered some Ham Cubes from North Star Bison.  They inadvertently sent me "Pork Cubes" instead of ham.  I didn't have a clue how to cook them, so I asked for advice and they told me to cook them like stew.

An internet search turned up only 'Mexican' style recipes for pork "stew" so I went with that flavor profile and pulled together something CREAMY and SPICY I thought my husband would enjoy.  I think you could also make this using red tomatoes instead of tomatillos, red peppers instead of poblanos, and cayenne instead of jalapeno powder.

Stew meat is generally tough so I cooked it in my pressure cooker and it was (1) ready in 45 minutes and (2) tender and delicious!

Creamy Spicy Pork Stew (or Soup) with Coconut Milk, Poblano, Tomatillo


Serves 6-8

 INGREDIENTS

  • 2 pounds pork cubes
  • 2 cups 1/4" sliced onions (I used frozen)
  • 8 poblano peppers, seeded and sliced 1/4" thick (I used frozen)
  • 6 cups canned tomatillos with their juice
  • 4 t. ground cumin
  • 4 t. garlic powder
  • 2 t. ground coriander
  • 2 t. Mexican oregano
  • 3-4 t. ground jalapeno powder, or to taste.  This much will be HOT!
  • 3 t. salt
  • 1 can coconut milk, solids only

INSTRUCTIONS

Note: I used the liquid from the tomatillos to prevent the stew from burning in the pressure cooker, and then I strained most of it out before serving.  The liquid is flavorful (I drank it later as "broth"), so if you prefer a more soupy consistency, leave it in and eat this from a bowl with tortilla chips crumbled over the top.  

In the photo below, you can see the frozen poblano peppers (upper left corner) and frozen onions (lower right corner) along with the pork (upper right corner), tomatillos and spices:

Frozen ingredients into the pressure cooker!

Combine everything except the coconut milk in a 6-quart pressure cooker.  Bring to a simmer over medium-high heat, put the lid on, and bring to 10# pressure.  Reduce heat to maintain pressure and cook for 30 minutes.  

Creamy pork stew ingredients before cooking.

Release the pressure (I let the pressure drop naturally), remove the lid, and remove the pork and vegetables to another saucepan using a strainer, leaving behind most of the cooking liquid.  Over medium heat, stir in the solids from a can of coconut milk, bring to a simmer and serve.  (If you use the liquid from the coconut milk it will be too soupy - you just want to make this creamy.)

We ate this rolled into tortillas with guacamole, and sour cream.

The next day, we reheated it with some of the reserved liquid and ate it like stew with chips crumbled on top.  A sprinkle of chopped cilantro would be a nice addition.

Bowl of pork stew with cassava chips.


Saturday, March 18, 2023

RECIPE: Beef or Lamb Curry with Cauliflower, Peas, Kashmiri Spices, and Coconut Milk

Our CSA's founding farmer's wife recommended Burlap and Barrel as a good place to get spices, so I bought a few things to try.  One of those things was their Kashmiri Masala, developed by Floyd Cardoz.  I also bought their Kashmiri Chili Powder, because I've never seen it for sale elsewhere, and I have other recipes that call for it.

Last night, I needed a quick meal, and pulled this together using the above mentioned spices.  I have no idea whether any of these ingredients are used in traditional Kashmiri cooking but we enjoyed the meal. 

Regarding the meat: at the end of the summer, when our CSA cows have been on grass for several months, if one is sent to the butcher I will buy 12-14 pounds of stew meat and pressure can it in 7 quart jars.  I get approximately 1.75 pounds in each jar, and it makes its own broth.  Once the meat is canned, it will keep at room temperature for several years.  When I use it, it's already tender and just needs to be seasoned and heated.  Using this meat, I can make this dish start to finish in under one hour!  

I used beef, but you could also use lamb or bison.

Like most curries, this is better the next day, so I make a large amount and we reheat it.   

Beef Curry with Cauliflower, Peas, Kashmiri Spices and Coconut Milk


Serves 6-8


INGREDIENTS

  • 1/3 cup ghee
  • 2 large onions, thinly sliced
  • 1/3 cup minced ginger
  • 1/3 c minced garlic
  • 2 T. Kashmiri Masala
  • 2 T. Kashmiri Chili Powder (this will be HOT!  Use less if you can't eat HOT food!)
  • 3.5 pounds beef stew, preferably home canned (for me, that's 2 quart jars)*
  • 1 13.5oz can coconut milk
  • 1 pound cauliflower florets parboiled (I used frozen)
  • 1 pound petite peas** parboiled (I used frozen)
  • Optional: chopped cilantro garnish (I used frozen)

INSTRUCTIONS

In a large saute pan, melt half the ghee on medium high and brown the onions.  Push the onions to the side of the pan.

Melt the rest of the ghee in the center of the pan and add the spices.  Stir for 1-2 minutes, then stir into the onions.

Sauteed onions with spices

Add the ginger and stir for 1-2 minutes. 

Add the ginger
 

Add the beef and any juices in the jars.  Add the garlic.  Stir to combine and simmer uncovered until most of the liquid has evaporated, about 5 minutes.  (If you're using raw beef, add it to the pan and let it brown.  Once it's browned, add 2 cups of beef broth or water and the garlic, lower the heat to medium, cover the pan and simmer until the beef is tender, 1-2 hours.  Remove the cover and simmer until most of the liquid has evaporated.)

Add the meat, broth and the garlic.

Add the coconut milk and simmer until the liquid is reduced by half and the sauce is thick and creamy.

Add the cauliflower and simmer 5 minutes.  We like our cauliflower al-dente.  If you like yours softer, cook it a little longer.

When the sauce is thick, add the cauliflower.


Add the peas and simmer 1-2 minutes.  If you're using fresh farm peas**, they will take longer to cook, so add them with the cauliflower.   

Add the peas.

Sprinkle with chopped coriander and serve with a dollop of yogurt or sour cream. 


* If you don't have canned beef stew meat, you can use raw but it will take much longer to cook.  In that case, you will need 2 cups of liquid, either broth or water, in addition to the meat.

** I LOVE tiny peas!  When I shuck our farm peas, I separate out the small ones and freeze them separately.  When I run out, I buy Whole Foods brand organic petite peas. 


Curry with yogurt