Monday, March 27, 2023

RECIPE: Creamy Spicy Pork Stew Soup with Coconut Milk, Poblano, Tomatillo

Last month, I ordered some Ham Cubes from North Star Bison.  They inadvertently sent me "Pork Cubes" instead of ham.  I didn't have a clue how to cook them, so I asked for advice and they told me to cook them like stew.

An internet search turned up only 'Mexican' style recipes for pork "stew" so I went with that flavor profile and pulled together something CREAMY and SPICY I thought my husband would enjoy.  I think you could also make this using red tomatoes instead of tomatillos, red peppers instead of poblanos, and cayenne instead of jalapeno powder.

Stew meat is generally tough so I cooked it in my pressure cooker and it was (1) ready in 45 minutes and (2) tender and delicious!

Creamy Spicy Pork Stew (or Soup) with Coconut Milk, Poblano, Tomatillo


Serves 6-8

 INGREDIENTS

  • 2 pounds pork cubes
  • 2 cups 1/4" sliced onions (I used frozen)
  • 8 poblano peppers, seeded and sliced 1/4" thick (I used frozen)
  • 6 cups canned tomatillos with their juice
  • 4 t. ground cumin
  • 4 t. garlic powder
  • 2 t. ground coriander
  • 2 t. Mexican oregano
  • 3-4 t. ground jalapeno powder, or to taste.  This much will be HOT!
  • 3 t. salt
  • 1 can coconut milk, solids only

INSTRUCTIONS

Note: I used the liquid from the tomatillos to prevent the stew from burning in the pressure cooker, and then I strained most of it out before serving.  The liquid is flavorful (I drank it later as "broth"), so if you prefer a more soupy consistency, leave it in and eat this from a bowl with tortilla chips crumbled over the top.  

In the photo below, you can see the frozen poblano peppers (upper left corner) and frozen onions (lower right corner) along with the pork (upper right corner), tomatillos and spices:

Frozen ingredients into the pressure cooker!

Combine everything except the coconut milk in a 6-quart pressure cooker.  Bring to a simmer over medium-high heat, put the lid on, and bring to 10# pressure.  Reduce heat to maintain pressure and cook for 30 minutes.  

Creamy pork stew ingredients before cooking.

Release the pressure (I let the pressure drop naturally), remove the lid, and remove the pork and vegetables to another saucepan using a strainer, leaving behind most of the cooking liquid.  Over medium heat, stir in the solids from a can of coconut milk, bring to a simmer and serve.  (If you use the liquid from the coconut milk it will be too soupy - you just want to make this creamy.)

We ate this rolled into tortillas with guacamole, and sour cream.

The next day, we reheated it with some of the reserved liquid and ate it like stew with chips crumbled on top.  A sprinkle of chopped cilantro would be a nice addition.

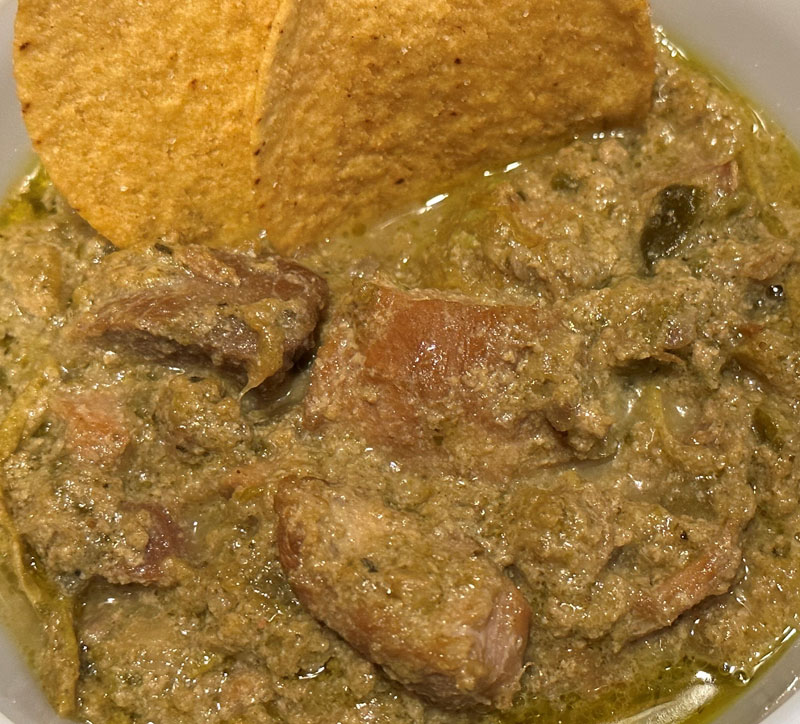
Bowl of pork stew with cassava chips.


Saturday, March 18, 2023

RECIPE: Beef or Lamb Curry with Cauliflower, Peas, Kashmiri Spices, and Coconut Milk

Our CSA's founding farmer's wife recommended Burlap and Barrel as a good place to get spices, so I bought a few things to try.  One of those things was their Kashmiri Masala, developed by Floyd Cardoz.  I also bought their Kashmiri Chili Powder, because I've never seen it for sale elsewhere, and I have other recipes that call for it.

Last night, I needed a quick meal, and pulled this together using the above mentioned spices.  I have no idea whether any of these ingredients are used in traditional Kashmiri cooking but we enjoyed the meal. 

Regarding the meat: at the end of the summer, when our CSA cows have been on grass for several months, if one is sent to the butcher I will buy 12-14 pounds of stew meat and pressure can it in 7 quart jars.  I get approximately 1.75 pounds in each jar, and it makes its own broth.  Once the meat is canned, it will keep at room temperature for several years.  When I use it, it's already tender and just needs to be seasoned and heated.  Using this meat, I can make this dish start to finish in under one hour!  

I used beef, but you could also use lamb or bison.

Like most curries, this is better the next day, so I make a large amount and we reheat it.   

Beef Curry with Cauliflower, Peas, Kashmiri Spices and Coconut Milk


Serves 6-8


INGREDIENTS

  • 1/3 cup ghee
  • 2 large onions, thinly sliced
  • 1/3 cup minced ginger
  • 1/3 c minced garlic
  • 2 T. Kashmiri Masala
  • 2 T. Kashmiri Chili Powder (this will be HOT!  Use less if you can't eat HOT food!)
  • 3.5 pounds beef stew, preferably home canned (for me, that's 2 quart jars)*
  • 1 13.5oz can coconut milk
  • 1 pound cauliflower florets parboiled (I used frozen)
  • 1 pound petite peas** parboiled (I used frozen)
  • Optional: chopped cilantro garnish (I used frozen)

INSTRUCTIONS

In a large saute pan, melt half the ghee on medium high and brown the onions.  Push the onions to the side of the pan.

Melt the rest of the ghee in the center of the pan and add the spices.  Stir for 1-2 minutes, then stir into the onions.

Sauteed onions with spices

Add the ginger and stir for 1-2 minutes. 

Add the ginger
 

Add the beef and any juices in the jars.  Add the garlic.  Stir to combine and simmer uncovered until most of the liquid has evaporated, about 5 minutes.  (If you're using raw beef, add it to the pan and let it brown.  Once it's browned, add 2 cups of beef broth or water and the garlic, lower the heat to medium, cover the pan and simmer until the beef is tender, 1-2 hours.  Remove the cover and simmer until most of the liquid has evaporated.)

Add the meat, broth and the garlic.

Add the coconut milk and simmer until the liquid is reduced by half and the sauce is thick and creamy.

Add the cauliflower and simmer 5 minutes.  We like our cauliflower al-dente.  If you like yours softer, cook it a little longer.

When the sauce is thick, add the cauliflower.


Add the peas and simmer 1-2 minutes.  If you're using fresh farm peas**, they will take longer to cook, so add them with the cauliflower.   

Add the peas.

Sprinkle with chopped coriander and serve with a dollop of yogurt or sour cream. 


* If you don't have canned beef stew meat, you can use raw but it will take much longer to cook.  In that case, you will need 2 cups of liquid, either broth or water, in addition to the meat.

** I LOVE tiny peas!  When I shuck our farm peas, I separate out the small ones and freeze them separately.  When I run out, I buy Whole Foods brand organic petite peas. 


Curry with yogurt


Monday, March 6, 2023

We hosted a Star Trek party last weekend!

When we lived in Illinois, we would host a HUGE Star Trek costume party, but we archived it when we moved to New England.  Until last week!  This party wasn't the big event we used to host, but it was still a lot of fun.  Here are some photos and links to the HEALTHY food's we served.  Yes, you can host a Sci-Fi party and serve healthy food!

The Kitchen:


The Dining Room:


The Wine and Spirits:


The Cocktails and Glasses:

We served three cocktails created to highlight the Romulan Rye and Romulan Vodka, 
and one low-alcohol cocktail, a Ferengi Starduster, using Kombucha, Tranya and Langour.
 

The Food:

Suliban Swamp Slug with entrails, Lorvan Chips, Moba Fruit Slices, and Quadrotriticale Crackers (Garlic and herb quark cheese log with pimiento pepper center, plantain chips, watermelon radish, and flax seed crackers)

Bajoran Hasparat with Rekja Sauce (Rolled tortilla filled w hummus, watercress, olives, sun dried tomatoes, and optional SPICY Moroccan dipping sauce)

Ferengi Tube Grub Salad (Charred octopus in lemon olive oil – will be good on the salad below)

Leola Root Salad with Humat Pod Dressing (Arugula salad with roasted fennel, caper and lemon dressing)

Bajoran Albino Ratamba Casserole with Pandoran Puffer Fungus (Veal meatballs and roasted mushrooms in asparagus cream sauce (remember, Bajoran food is spicy))

Wentlian Condor Snake (Haricots verts w onions, garlic, tomato, espelette and EVOO)

Mashed Coltayin Root (Mashed Roasted Celeriac with roasted garlic and thyme)


RECIPE: Bajoran Hasparat with Spicy Dipping Sauce

This was the appetizer we served for those people who avoid dairy, garlic, and peppers.  We made half of them with almond tortillas for the gluten-free folks, and they were VERY hard to roll.  We made the other half with wheat tortillas (for the people who avoid nuts).  At the end of the party, most of the wheat ones were gone and most of the almond ones were still there!  I developed the recipe for the party.

Hasparat are supposed to be eye-wateringly spicy, but some of our guests can't handle spicy, so we made the sauce spicy for those people who can.

Bajoran Hasparat with SPICY dipping sauce


Ingredients:

Instructions:

Warm the tortillas to soften them or they won't roll.  We put them in a 350F oven for a few minutes.

Spread each tortilla with 2 T. hummus.

Top with a thin layer of greens, then sprinkle on olives and dried tomatoes.

Roll up the tortilla and cut into 3 or 4 bite-size pieces.

Serve with the sauce on the side.  You could also serve these with your favorite hot sauce or sriracha.

*If you know your guests like garlic, feel free to add it! 


RECIPE: Bajorn Ratamba Casserole with Pandoran Puffer Fungus (veal meatballs and mushroom in asparagus cream)

This recipe is the star of our Star Trek parties!  Bajoran food is spicy, so both the meatballs and the sauce have added cayenne.  I created the recipe for the party.  

We invited 14 people so I made 360 meatballs.  Yes, that was waaaay too many!  I figured 1/2 pound of meat per person with a little extra for leftovers.  We had a massive amount of leftovers, so we've been eating them every day, and every day we both RAVE about how good they are!

Bajorn Ratamba Casserole with Pandoran Puffer Fungus 

(veal meatballs and mushroom in asparagus cream sauce)

Serves 6-8?

For the party, I used 8 pounds of veal - 6 pounds of ground and 2 pounds of raw - and it made 360 one-inch meatballs or 45 meatballs per pound.  The dish is rich, so we eat only 6-10 meatballs per serving.  In other words, one pound of meat will serve about 4 people!  Use that to calculate how much to make.  

As you can see, there is no asparagus visible in the photo.  The asparagus is creamed and added to the sauce.  It's the secret ingredient that makes it so delicious!  It will turn the sauce slightly green, which is how Ratamba Casserole is supposed to look.

Ingredients for meatballs:

  • 2 pounds of ground veal, either raw or a combination of raw and canned
  • 4 large eggs
  • 1/4 cup ground chia seeds
  • 2 medium onions, minced
  • 4 T. ghee
  • Seasoning mix for meatballs:
    • 1 T. salt
    • 2 t. garlic (or 3 t. fresh)
    • 2 t. paprika
    • 2 t. basil (or 3 t. fresh)
    • 2 t. cayenne


Ingredients for sauce:

  • 2 12-ounce packages frozen asparagus, defrosted*
  • 2 pounds of mushrooms, cleaned and sliced
  • 2 large onions, sliced 1/4" thick
  • 1/4 c. ghee
  • 2 cups heavy cream
  • Seasoning mix for sauce, identical to meatballs:
    • 2 t. salt
    • 2 t. garlic (or 3 t. fresh)
    • 2 t. paprika
    • 2 t. basil (or 3 t. fresh)
    • 2 t. cayenne (or to taste)


Make the meatballs according to the directions here, but using the ingredients listed above.  When the meatballs come out of the oven, remove them to a bowl and scrape all the liquid that exuded into a large saute pan.  Add 1/4c. ghee and heat on medium-high.

Add the onions and saute until lightly browned.  Push them to the side of the pan.
Add the mushrooms and saute until lightly browned.  Push them to the side of the pan.
Add the seasoning mix and saute lightly. 
Add the cream, mix everything together and bring to a boil.  Reduce the heat and keep warm.

Remove any yellow ends from the asparagus and discard them.  In a food processor, puree the asparagus until smooth.  Stir the puree into the sauce, and continue stirring until heated through.
Taste and adjust seasoning. 

Add the meatballs, heat and serve.   

We served these with mashed roasted celeriac, and long-cooked green beans, but they were delicious when we reheated them with just roasted broccoli!  

This did NOT FREEZE WELL!  When I reheated it on the cooktop, all the meatballs fell apart!  it might have been OK reheated in the oven, and not stirred at all, but I wouldn't risk it!


*This would be about 2 pounds fresh, cleaned and blanched,but frozen is so much easier for this recipe!


RECIPE: Mashed ROASTED Celeriac with Roasted Garlic and Thyme

As good as mashed celeriac is, mashed ROASTED celeriac is even better!  

When our farm harvests garlic for the season, I roast as much as I can to tide me over the winter until the next harvest.  It adds umami to this recipe.

Sorry, I don't have a better photo - I served these in a cast iron pot so they would stay warm longer and the photo is very dark!  Because the celeriac is roasted before pureeing, it will be darker than the regular Mashed Celeriac but not quite as dark as the photo!

I made these for Friendsgiving this year and got some better photos of the beginning of the process, but I was scrambling at the end and didn't get photos of the braising steps.  You can see them in the original recipe.

Original recipe: Mashed Celeriac with Garlic and Thyme

Mashed Roasted Celeriac with Roasted Garlic and Thyme

Serves 8-10

Ingredients

  • 4 large celeriac (or 15 small ones - about 4 pounds)
  • 1/4 cup ghee, melted
  • 2 c. milk, broth or water
  • 4-8 roasted garlic gloves depending on how much you like garlic
  • 1 t. dried thyme leaves
  • 2 t. himalayan pink salt

Instructions

Preheat the oven to 375F.

Clean the celeriac, tossing them into a bowl of cold water to keep them from turning brown.

Cut them into 1/2 - 3/4" pieces.  Toss them with the melted ghee and arrange in a single layer on a cookie sheet. (I used two sheet pans)

Roast until the edges are browned.

Transfer to a sauce pan and add the liquid.  Bring to a simmer, cover the pot and simmer until the celeriac is very soft, 30 minutes to 1 hour.  Stir occasionally to insure that every piece is occasionally submerged.  The photo below is before I added the milk and garlic.

Using a slotted spoon, transfer the softened celeriac to the bowl of a food processor.  Add the garlic and process, adding the liquid from the pan, a small amount at a time, until it's smooth and creamy like mashed potatoes.  You may not need all the liquid in the pan, or you may need to add additional liquid (either broth, water, or milk), depending on your texture preference.  Add the thyme and season with salt.  Pulse to combine. 

Serve immediately drizzled with butter.

If there are leftovers, they can be reheated in a 350F oven.  You can also reheat them on the cooktop if you add some liquid to the pan first and then heat them on med-low. 

PHOTOS:

 Clean the celeriac, tossing them into a bowl of cold water to keep them from turning brown.


Cut them into 1/2 - 3/4" pieces.  Toss them with the melted ghee and arrange in a single layer on a cookie sheet. (I used two sheet pans)


Roast until the edges are browned.  The photo below is both sheet pans combined.


Transfer to a sauce pan and add the liquid.  Bring to a simmer, cover the pot and simmer until the celeriac is very soft, 30 minutes to 1 hour.  Stir occasionally to insure that every piece is occasionally submerged.  The photo below is before I added the milk and garlic.


Using a slotted spoon, transfer the softened celeriac to the bowl of a food processor.  Add the garlic and process, adding the liquid from the pan, a small amount at a time, until it's smooth and creamy like mashed potatoes.  You may not need all the liquid in the pan, or you may need to add additional liquid (either broth, water, or milk), depending on your texture preference.  Add the thyme and season with salt.  Pulse to combine. 


Serve immediately drizzled with butter.

If there are leftovers, they can be reheated in a 350F oven.  You can also reheat them on the cooktop if you add some liquid to the pan first and then heat them on med-low.  


RECIPE: How to Roast Hard-Neck Garlic

I can't believe I haven't added this recipe sooner!  I took the photos two years ago.  It's one of the ways I preserve garlic so that it lasts all winter.  

America's Test Kitchen just published an article on garlic that's started to sprout.  They had previously claimed that the little green sprouts were bitter and should be removed before using, but they did further testing which proved they were dead wrong!  The sprouts are fresh tasting - it's the old garlic that's strong and bitter!  I still use it, but in winter I love the mellow flavor of roasted garlic.

Most recipes instruct you to wrap the garlic heads in aluminum foil, but I don't like foil touching my food so I wrap them in parchment first, then foil. 

I roast some of them until they're very soft and caramelized, and others until they're just barely soft with a stronger garlic flavor, like the ones in the photo below.  Sometimes I use EVOO, sometimes I use ghee.  I keep the roasted cloves in the fridge and use them all winter long.


Our farm grows hard neck garlic, which keeps longer, but the hard neck is difficult to cut through!

Original recipe: How to roast garlic

How to Roast Hard-neck Garlic


Ingredients:

  • As many whole heads of fresh garlic as will fit in your pan - I used 10
  • 1-2 T fat for each head - I use either EVOO or ghee
  • Parchment paper cut into squares large enough to enclose one head
  • Aluminum foil cut into squares large enough to enclose one head


Instructions:

Preheat the oven to 400F. 

Our garlic is hard-neck, and it's dried with the roots and stalk intact.  These need to be removed prior to roasting:

Using a pair of sharp scissors, cut off the roots close to the bottom of the head.


Using a sharp knife, cut through the top 1/4" of each clove down to the stalk.


Using the scissors again, cut through the stalk.


Wrap each head in parchment, then foil, but do not close the tops!  Arrange them in a baking pan, using additional foil to insure they remain upright.  Add 1-2 T of fat to the tops of each head and twist the top closed. 


Roast for about 30 minutes.  I make some batches to be very soft and caramelized, so I will leave them in for a little longer.  I also make some batches to be less caramelized with stronger garlic flavor so I start checking them after 25 minutes.  Depending on your oven, you might need more or less time.

Remove the pan from the oven and let the heads cool, then remove the cloves from the head.  Some of them will squeeze right out, others will need to be pried.  I prefer to separate each clove and remove them as close to intact as possible! 


Store them in the refrigerator, covered with EVOO or ghee, until you use them.  You can also freeze them without covering them with oil.


RECIPE: Suliban Swamp Slug With Entrails

We hosted a Star Trek party last weekend!  We've done that before, many years ago, and we used some of the recipes from our earlier parties.  This is one of them.  

It's cream cheese seasoned with garlic and herbs, and then formed into a snake-like slug pattern with a center of thinly sliced spicy roasted red peppers.  When you cut into the slug, you expose the peppers, which can be mixed into the cheese or not, depending on each diner's preference.  

We served it with sliced watermelon radishes, plantain chips, flax seed crackers, and cassava chips.


 Suliban Swamp Slug with Entrails

Serves 10-12

We set a stainless tray in the center of a large white plastic sheet pan, formed the slug on the stainless tray, and then surrounded it with the dippers.  We also provided several serving knives which are not pictured above.  

In the past, I made this with cream cheese, but now I use our farm's Quark cheese which is creamier and looser than cream cheese, so I drained it overnight to make it stiff enough to hold its shape at room temperature.  It's winter, so I used the herbs I had frozen last summer. 

This is sort-of an un-recipe, because people's tolerance for herbs and garlic varies.  If you like highly seasoned food, use the larger quantities.  We made our slug with a highly seasoned head, an unseasoned tail, and a medium-seasoned middle.   You can see the transition in the photo.

Ingredients

  • 4 pounds Quark cheese
  • 1/4 - 1/2 cup chopped dill
  • 1/4 - 1/2 cup chopped parsley
  • 1/4 - 1/2 cups chopped scallion tops
  • 1-3 cloves garlic, grated on a microplane
  • 1/2 a small red onion for the 'spines'
  • 2 small scallions for the 'eyes'
  • 2 peppercorns for the 'eyeballs'
  • 8-16 ounces roasted red peppers
  • 1-2 T. balsamic vinegar
  • 1-2 T. honey
  • 1-2 t. cayenne pepper
  • Himalayan pink salt
  • Chips to serve it with. 

Instructions

Drain the cheese. I placed it in a muslin cloth and hung it over a strainer set over a bowl to catch the whey.  After 24 hours, about 2 cups of whey had drained out. 

4 pounds of quark draining in muslin over a bowl to catch the whey
Quark draining - before and after


Thinly slice the peppers and mix them with the cayenne, balsamic and honey.  Taste and adjust seasoning - it should be sweet-sour-spicy.  Add salt to taste and set aside.  You can keep this in the fridge for a few days for the flavors to penetrate the peppers.

Roasted red peppers, sliced thinly


Mix the drained cheese with the garlic, sliced scallions, herbs, and salt to taste.

Minced dill and parsley

Mixing the seasonings into the cheese.


To form the slug, spread a small amount of the cheese on your serving platter in the shape you want the slug to take.  We made the tail narrow and the head wide.

Deposit the sliced peppers in the middle of this shape to form the 'entrails'.

Arranging the entrails on the slug template!


Using gloved hands, form the cheese over the peppers into a slug shape.  

Cut the root ends off the two scallions, and slice off a 1-2" piece of the white part.  I think 1" would look better than the 2" pieces I used!  Push a peppercorn into the smaller end, and push the larger ends into the 'head' of your slug.

Cut the red onion into triangular pieces and arrange them down the back of the slug.

Red onion spines and green onion eyes!


Stab your slug to expose the entrails, so people know they're there!


Spread your dippers around the slug and serve!  We arranged the radish next to the slug so it wouldn't cause the chips to get soggy.


The next morning, when I took photos before starting to clean up, this is all that was left: